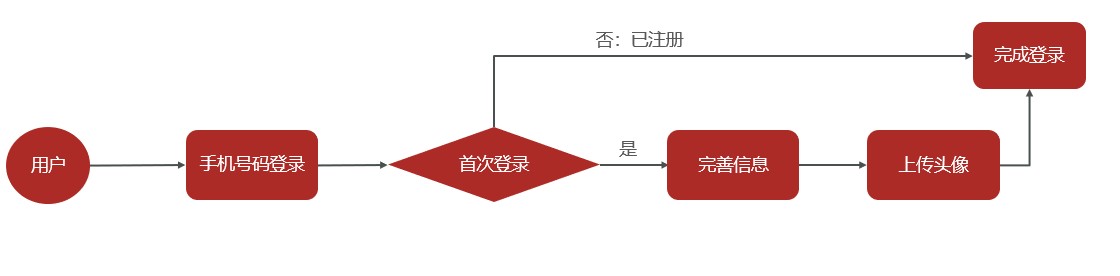
1、完善用户信息
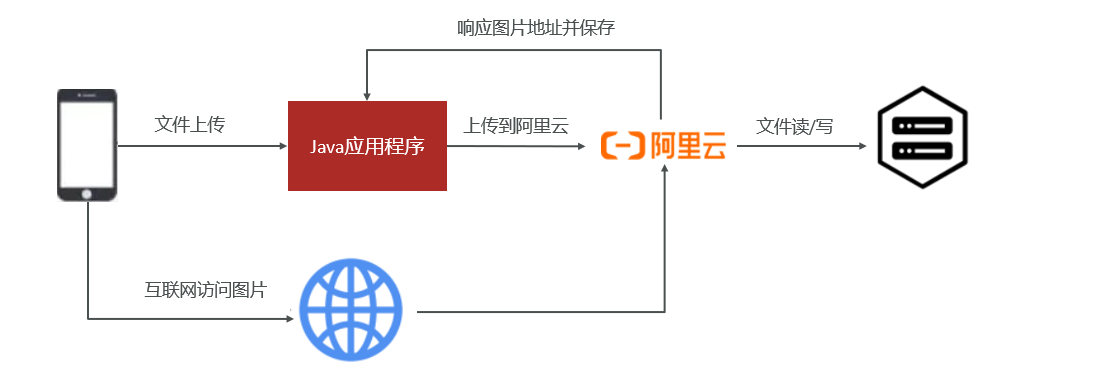
用户在首次登录时需要完善个人信息,包括性别、昵称、生日、城市、头像等。其中,头像数据需要做图片上传,这里采用阿里云的OSS服务作为我们的图片服务器,并且对头像要做人脸识别,非人脸照片不得上传。
1.1、阿里云OSS
实现图片上传服务,需要有存储的支持,那么我们的解决方案将以下几种:
- 直接将图片保存到服务的硬盘(springmvc将的文件上传)
- 优点:开发便捷,成本低
- 缺点:扩容困难
- 使用分布式文件系统进行存储
- 优点:容易实现扩容
- 缺点:开发复杂度稍大(有成熟的产品可以使用,比如:FastDFS)
- 使用第三方的存储服务
- 优点:开发简单,拥有强大功能,免维护
- 缺点:付费
1.1.1、概述
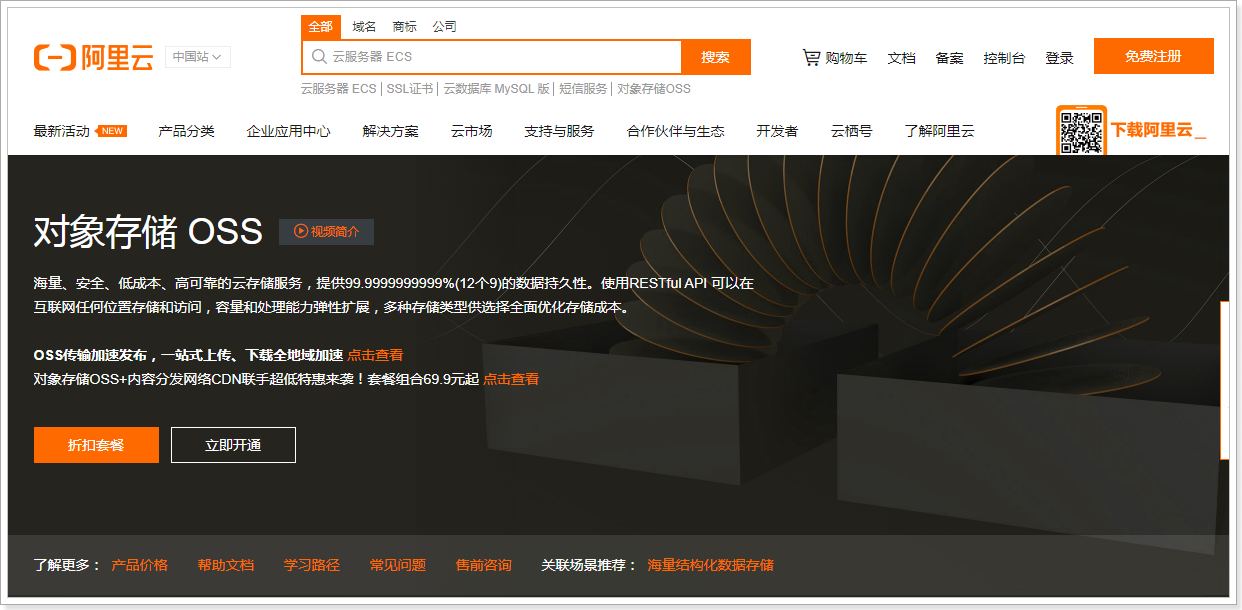
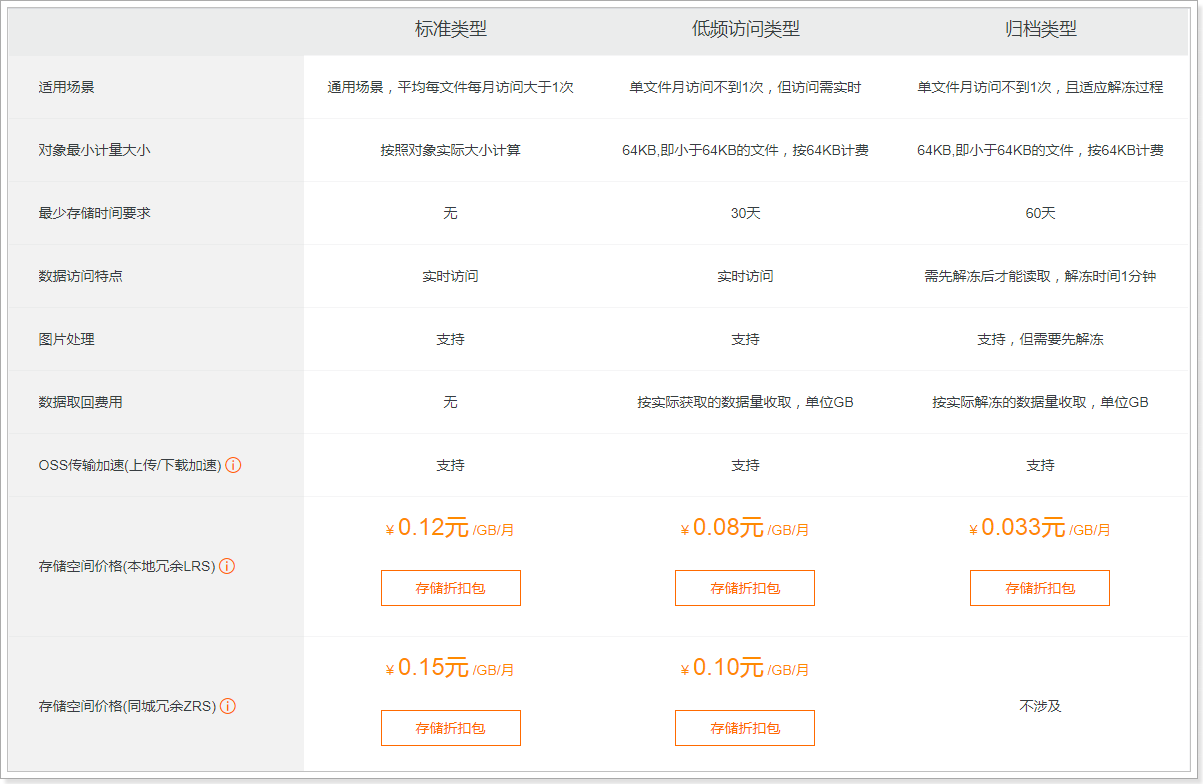
对象存储服务(Object Storage Service,OSS)是一种海量、安全、低成本、高可靠的云存储服务,适合存放任意类型的文件。容量和处理能力弹性扩展,多种存储类型供选择,全面优化存储成本。
地址:https://www.aliyun.com/product/oss
1.1.2、账号申请
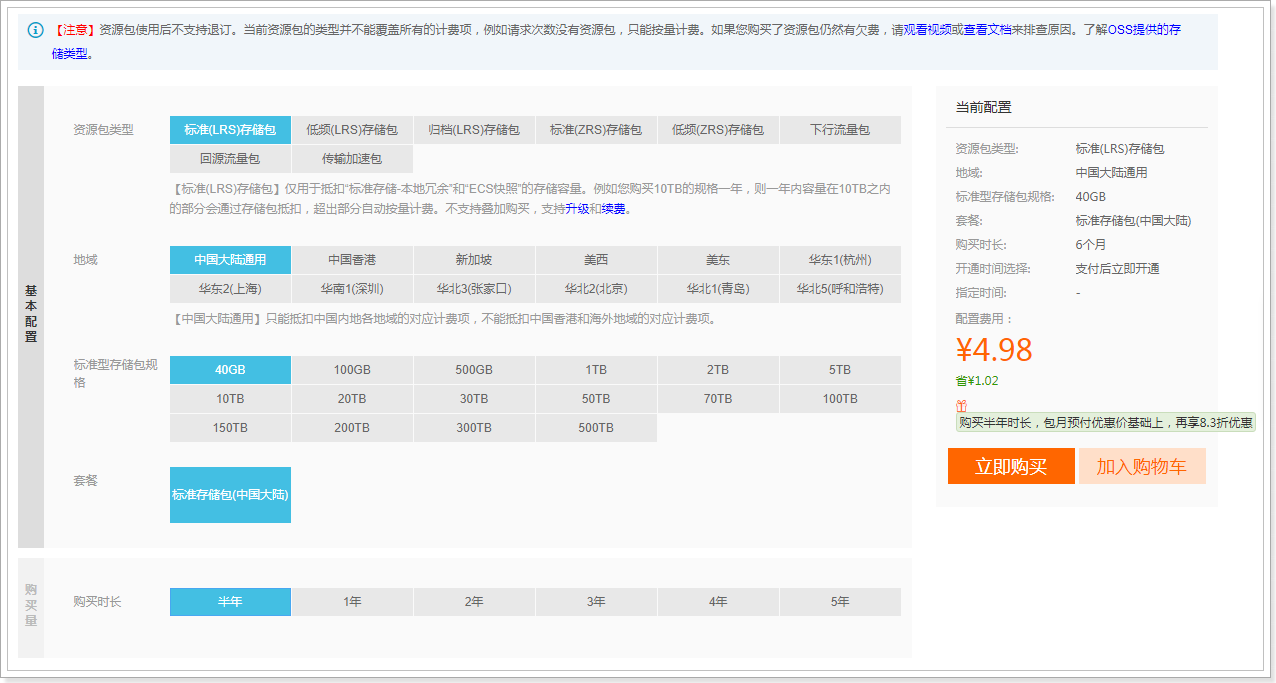
购买服务
使用第三方服务最大的缺点就是需要付费,下面,我们看下如何购买开通服务。
购买下行流量包: (不购买也可以使用,按照流量付费)
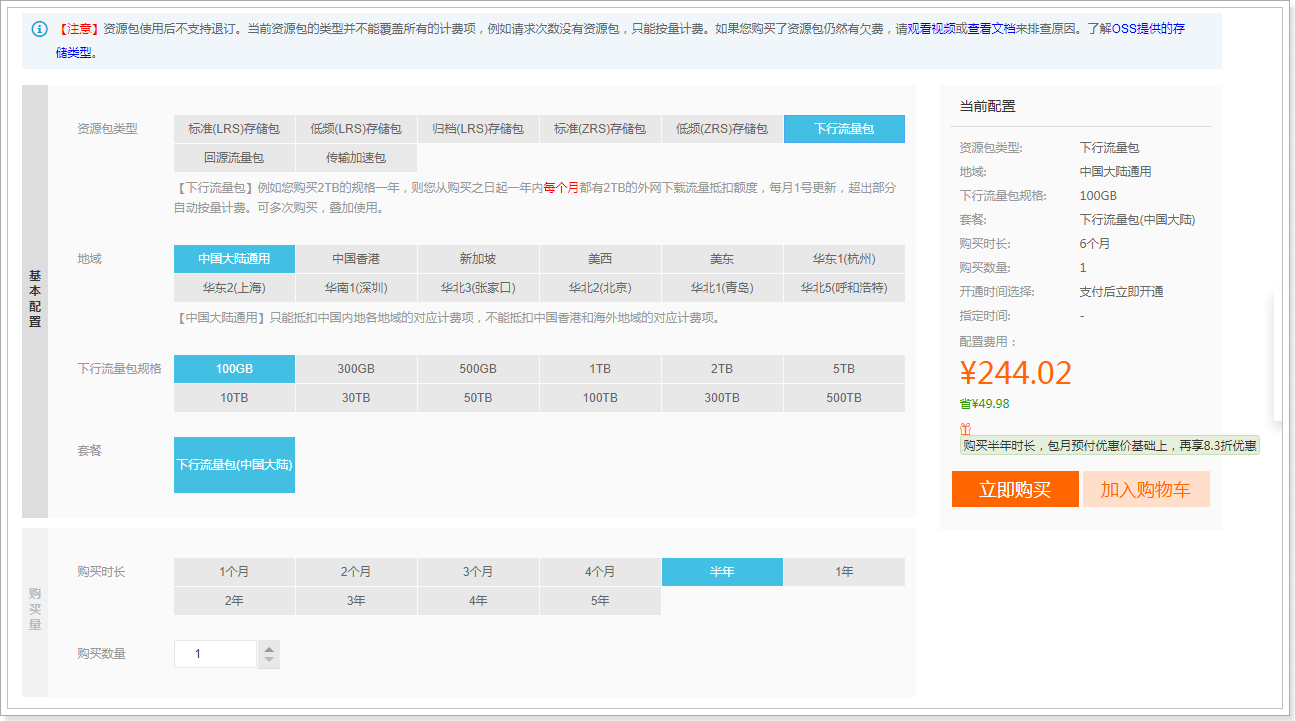
说明:OSS的上行流量是免费的,但是下行流量是需要购买的。
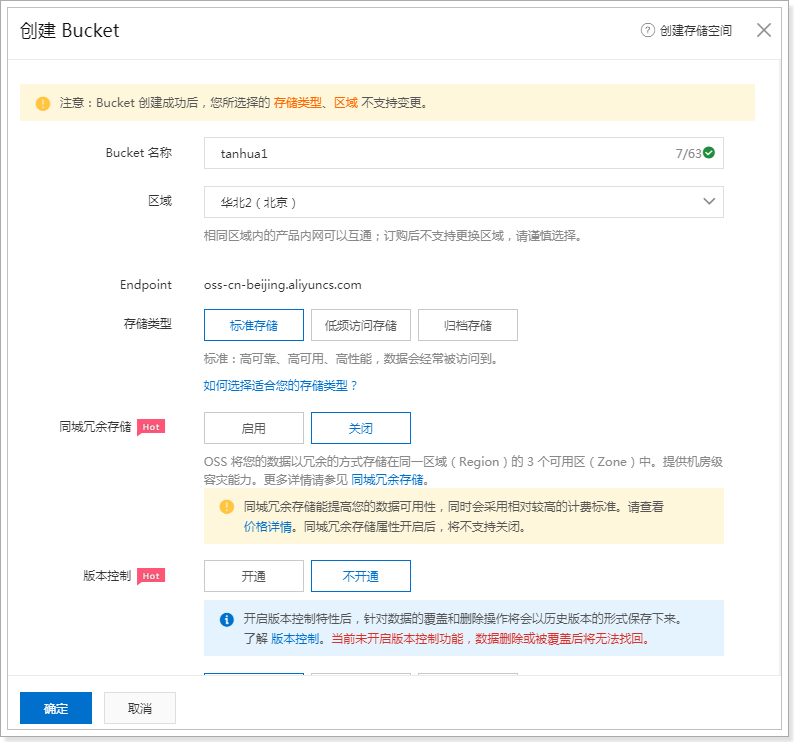
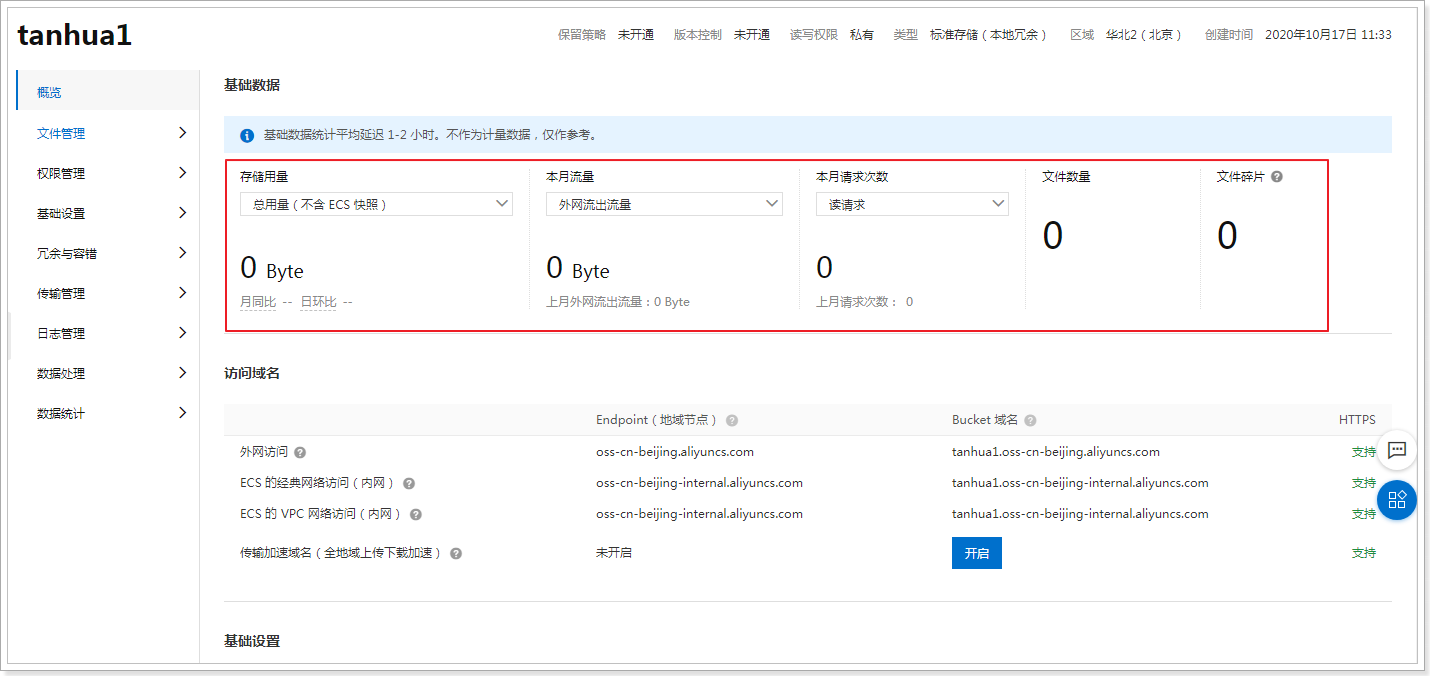
创建Bucket
使用OSS,首先需要创建Bucket,Bucket翻译成中文是水桶的意思,把存储的图片资源看做是水,想要盛水必须得有桶,就是这个意思了。
进入控制台,https://oss.console.aliyun.com/overview
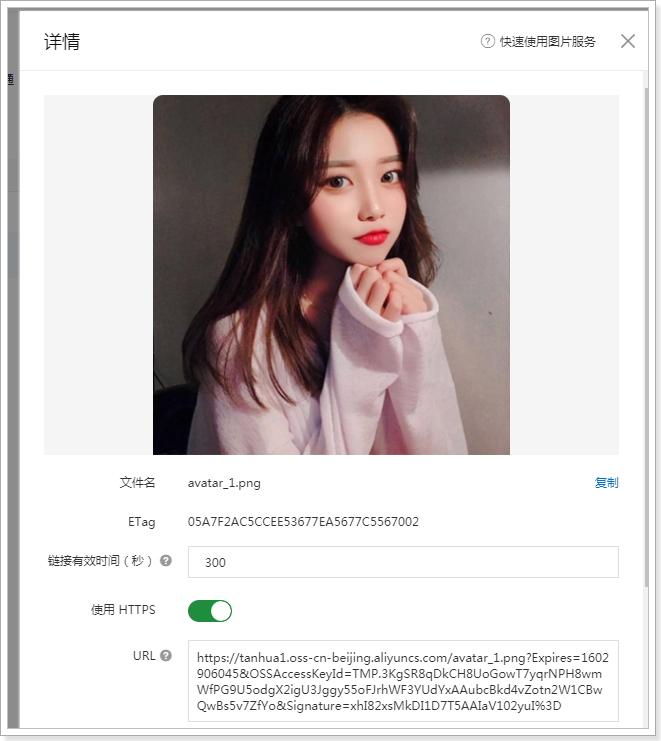
选择Bucket后,即可看到对应的信息,如:url、消耗流量等 :
文件管理:
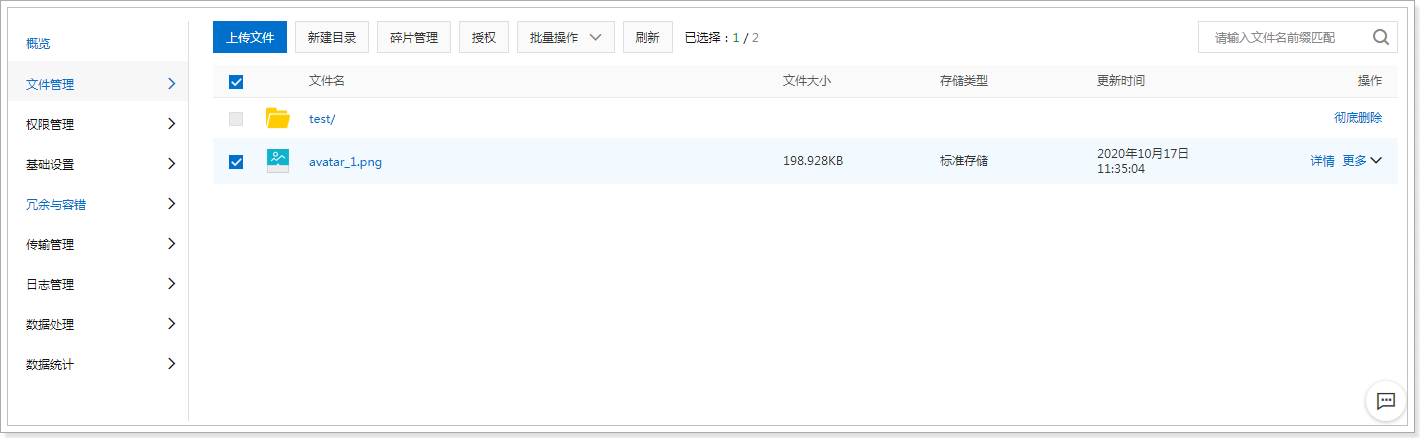
查看文件:
1.1.3、抽取模板工具
和发送短信类似,阿里云OSS也是采用自定义工具的形式进行封装
OssProperties
tanhua-autoconfig创建配置类
1
2
3
4
5
6
7
8
9
10
11
12
13
14
15
| package com.tanhua.autoconfig.properties;
import lombok.Data;
import org.springframework.boot.context.properties.ConfigurationProperties;
@Data
@ConfigurationProperties(prefix = "tanhua.oss")
public class OssProperties {
private String accessKey;
private String secret;
private String bucketName;
private String url;
private String endpoint;
}
|
OssTemplate
tanhua-autoconfig创建模板对象
1
2
3
4
5
6
7
8
9
10
11
12
13
14
15
| package com.tanhua.autoconfig.properties;
import lombok.Data;
import org.springframework.boot.context.properties.ConfigurationProperties;
@Data
@ConfigurationProperties(prefix = "tanhua.oss")
public class OssProperties {
private String accessKey;
private String secret;
private String bucketName;
private String url;
private String endpoint;
}
|
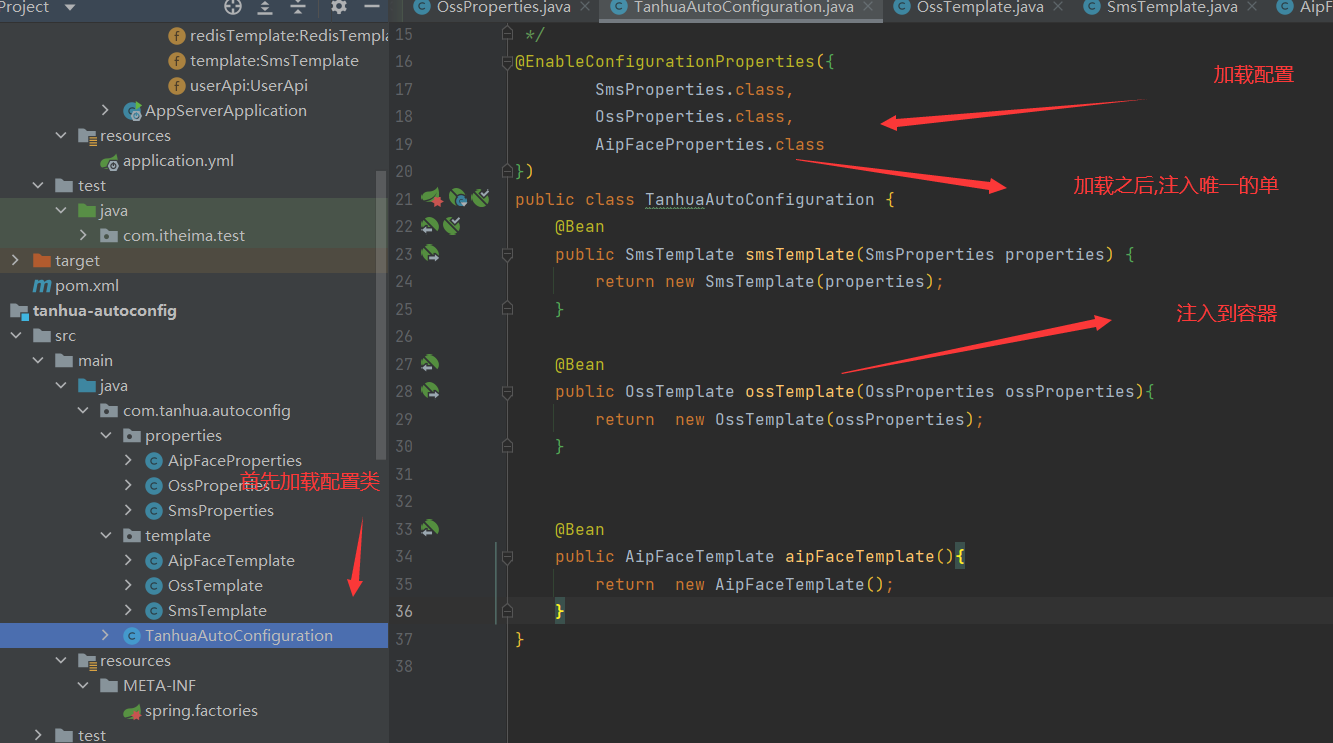
TanhuaAutoConfiguration
TanhuaAutoConfiguration加入配置,进行依赖注入
1
2
3
4
5
6
7
8
9
10
11
12
13
14
15
16
17
18
19
20
21
22
23
24
25
26
27
28
29
| package com.tanhua.autoconfig;
import com.tanhua.autoconfig.properties.OssProperties;
import com.tanhua.autoconfig.properties.SmsProperties;
import com.tanhua.autoconfig.template.OssTemplate;
import com.tanhua.autoconfig.template.SmsTemplate;
import org.springframework.boot.context.properties.EnableConfigurationProperties;
import org.springframework.context.annotation.Bean;
@EnableConfigurationProperties({
SmsProperties.class,
OssProperties.class
})
public class TanhuaAutoConfiguration {
@Bean
public SmsTemplate smsTemplate(SmsProperties properties) {
return new SmsTemplate(properties);
}
@Bean
public OssTemplate ossTemplate(OssProperties ossProperties){
return new OssTemplate(ossProperties);
}
}
|
1.1.4、测试
tanhua-app-server加入配置内容,并测试
1
2
3
4
5
6
7
8
9
10
11
12
| tanhua:
sms:
signName: 测试专用模板
templateCode: SMS_154950909
accessKey: LTAI5tH4vxb7jSevNHgX53rv
secret: FURM3LeH6BuspIzfmFUuuotd7hBqTu
oss:
accessKey: LTAI5tH4vxb7jSevNHgX53rv
secret: FURM3LeH6BuspIzfmFUuuotd7hBqTu
endpoint: oss-cn-hangzhou.aliyuncs.com
bucketName: kim-little
url: https://kim-little.oss-cn-hangzhou.aliyuncs.c
|
1
2
3
4
5
6
7
8
9
10
11
12
13
14
15
16
17
18
19
20
21
22
23
24
25
26
27
28
29
30
31
| package com.itheima.test;
import com.tanhua.autoconfig.template.OssTemplate;
import com.tanhua.server.AppServerApplication;
import org.junit.Test;
import org.junit.runner.RunWith;
import org.springframework.beans.factory.annotation.Autowired;
import org.springframework.boot.test.context.SpringBootTest;
import org.springframework.test.context.junit4.SpringRunner;
import java.io.File;
import java.io.FileInputStream;
import java.io.FileNotFoundException;
@RunWith(SpringRunner.class)
@SpringBootTest(classes = AppServerApplication.class)
public class OssTest {
@Autowired
private OssTemplate ossTemplate;
@Test
public void TestTemplatesUpload() throws FileNotFoundException {
String path ="C:\\Users\\wz\\Desktop\\简历\\金伟卓.png";
FileInputStream inputStream = new FileInputStream(new File(path));
String imageUrl = ossTemplate.upload(path, inputStream);
System.out.println("imageUrl = " + imageUrl);
}
}
|
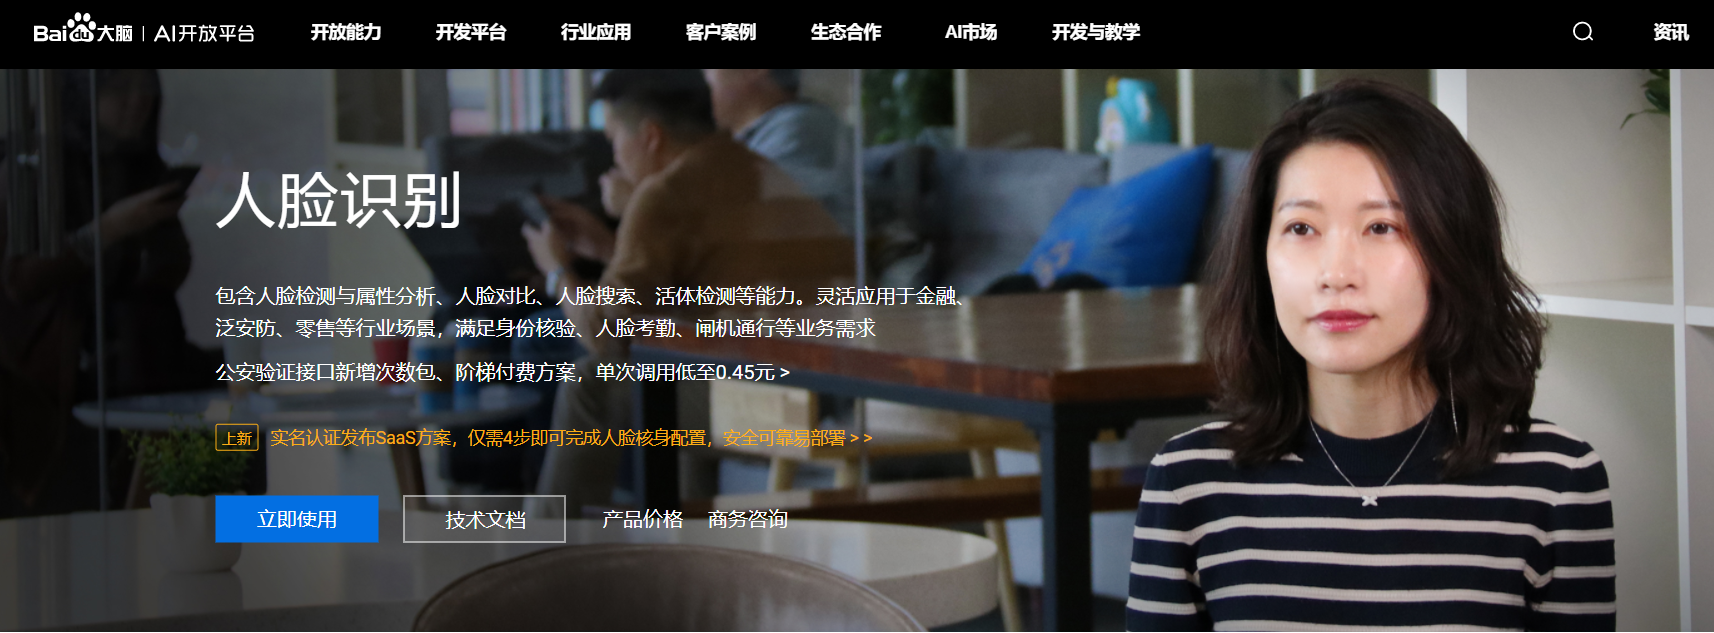
1.2、百度人脸识别
人脸识别(Face Recognition)基于图像或视频中的人脸检测、分析和比对技术,提供对您已获授权前提下的私有数据的人脸检测与属性分析、人脸对比、人脸搜索、活体检测等能力。灵活应用于金融、泛安防、零售等行业场景,满足身份核验、人脸考勤、闸机通行等业务需求
1.2.1、概述
地址:https://ai.baidu.com/tech/face
1.2.2、账号申请
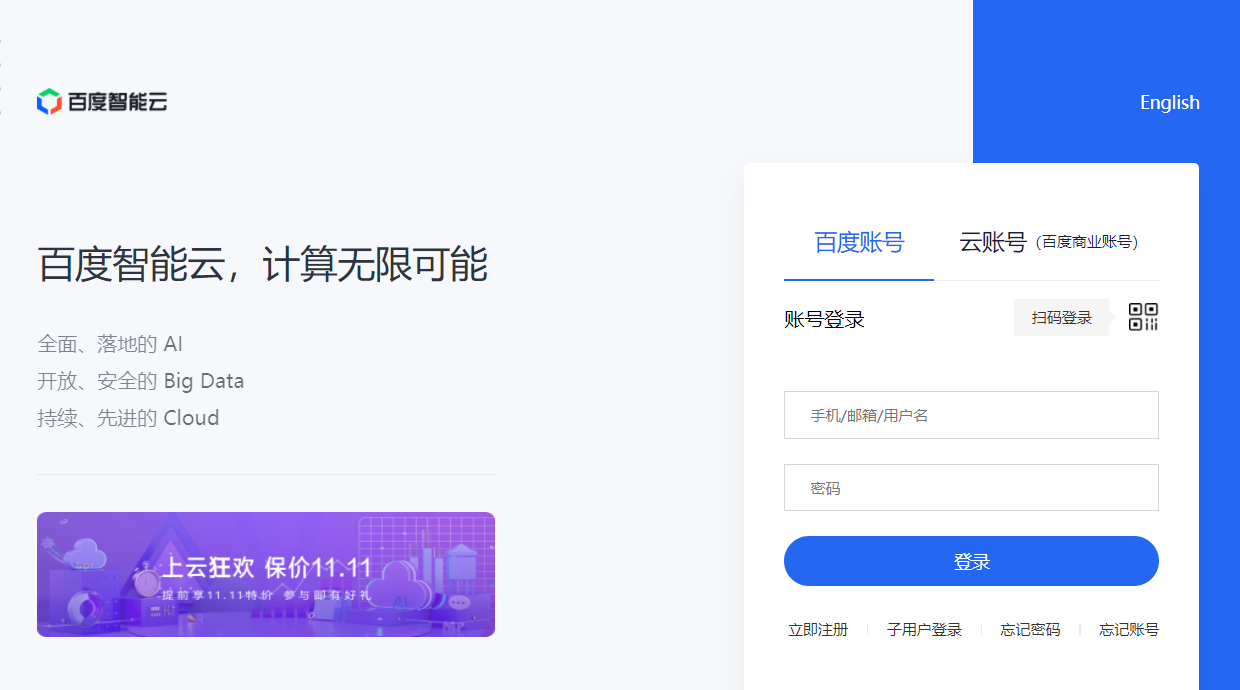
账号登录注册
百度云AI支持百度账号登录,也可以支持云账号。按需注册即可
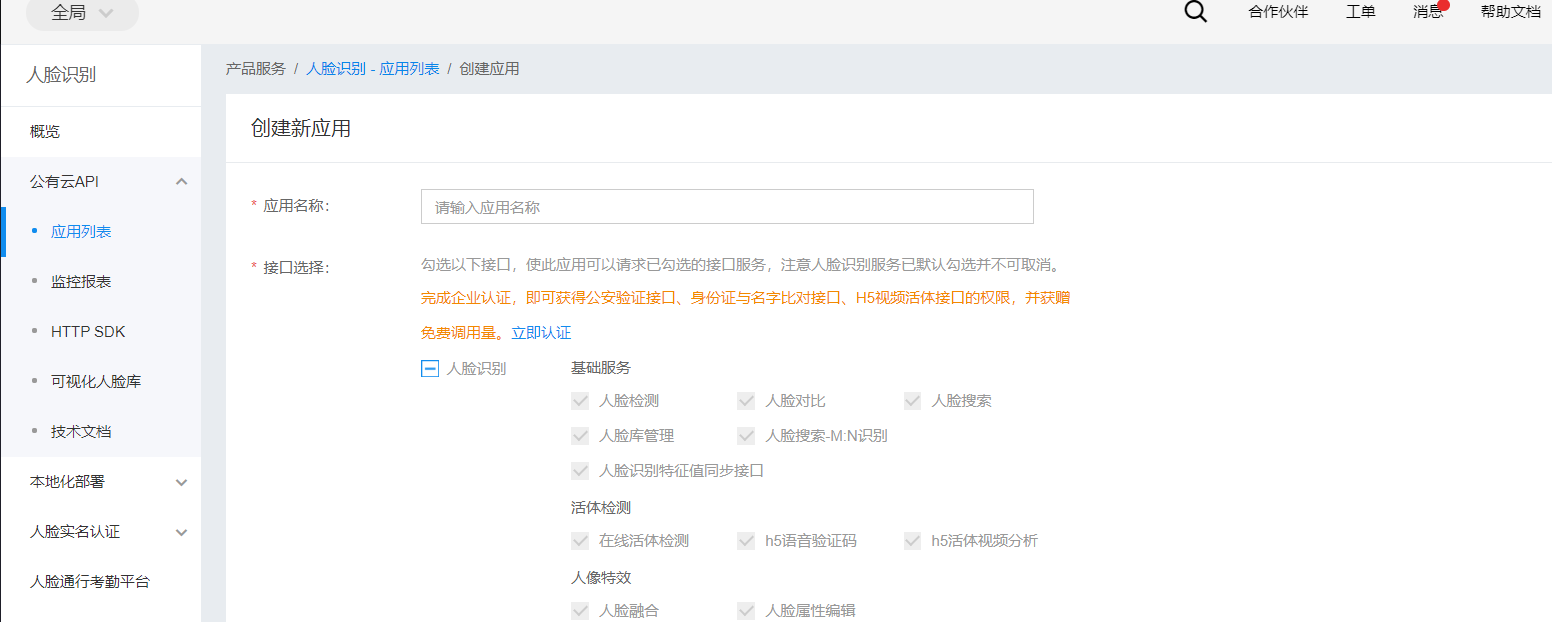
创建应用
按需创建应用
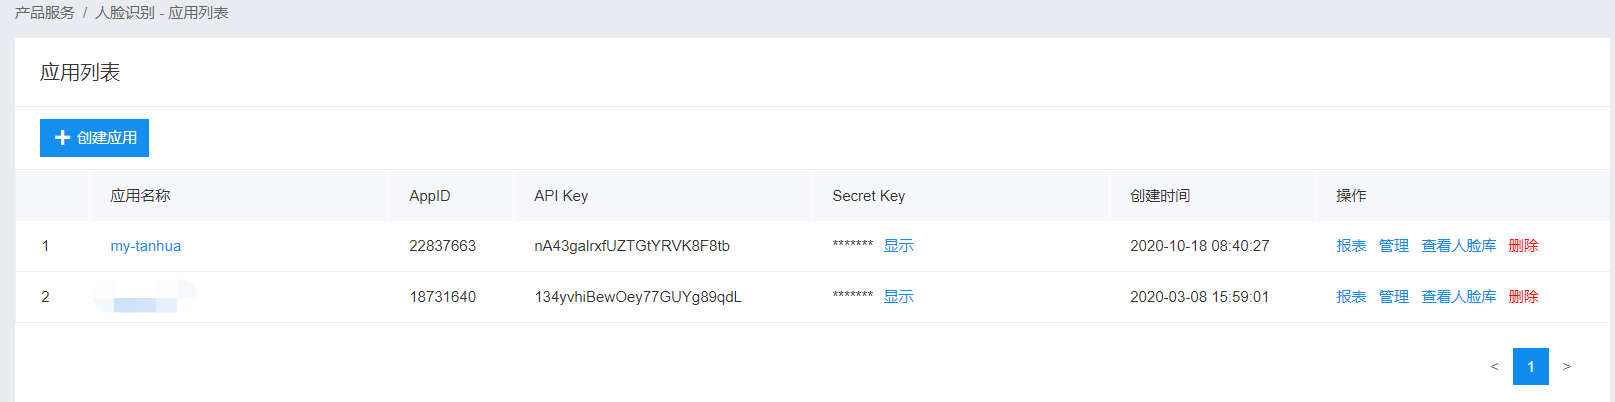
1.2.3、抽取模板工具

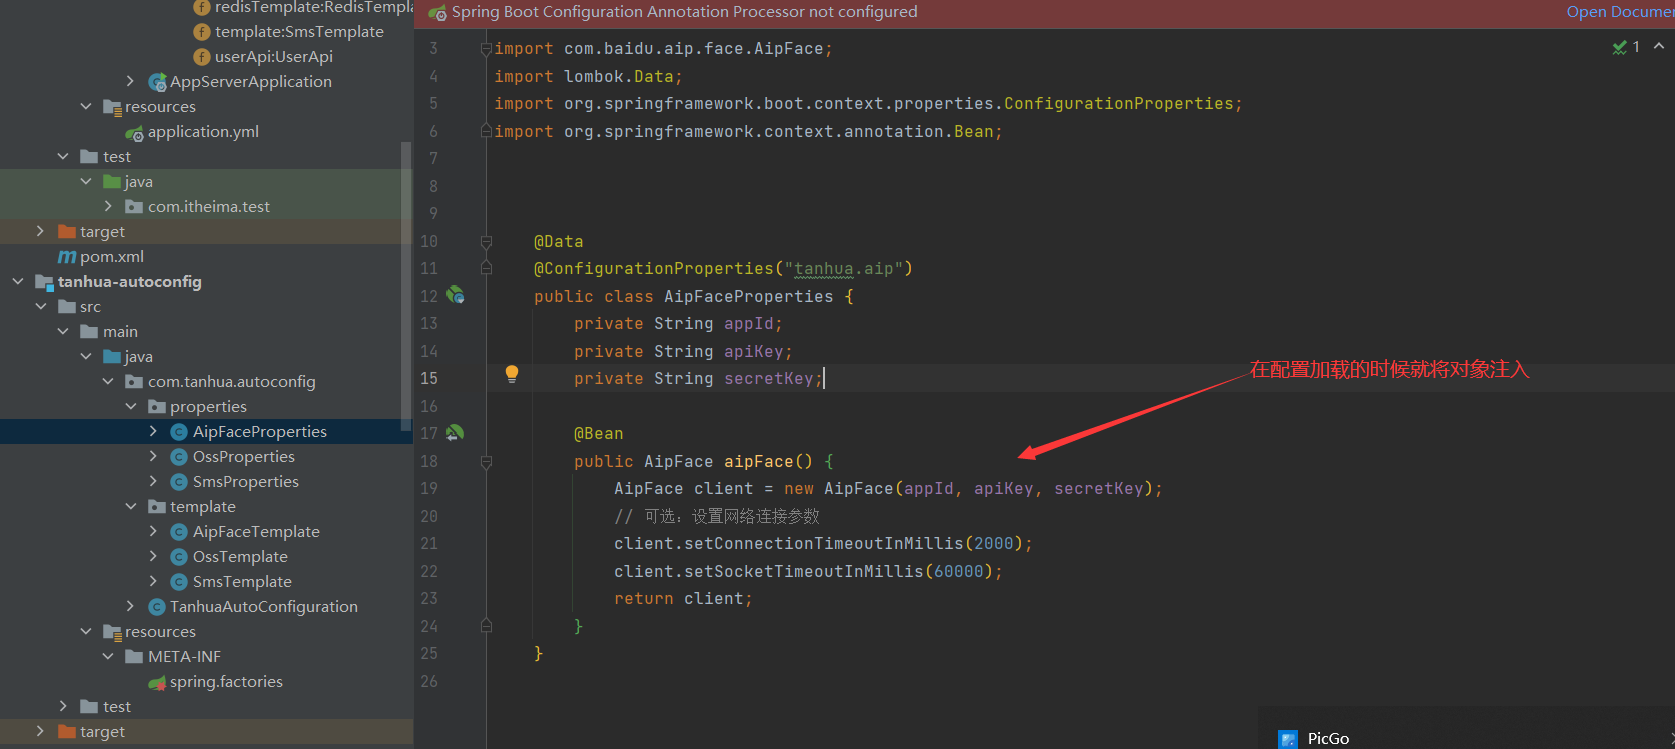
AipFaceProperties
1
2
3
4
5
6
7
8
9
10
11
12
13
14
15
16
17
18
19
20
21
22
23
24
25
26
| package com.tanhua.autoconfig.properties;
import com.baidu.aip.face.AipFace;
import lombok.Data;
import org.springframework.boot.context.properties.ConfigurationProperties;
import org.springframework.context.annotation.Bean;
@Data
@ConfigurationProperties("tanhua.aip")
public class AipFaceProperties {
private String appId;
private String apiKey;
private String secretKey;
@Bean
public AipFace aipFace() {
AipFace client = new AipFace(appId, apiKey, secretKey);
client.setConnectionTimeoutInMillis(2000);
client.setSocketTimeoutInMillis(60000);
return client;
}
}
|
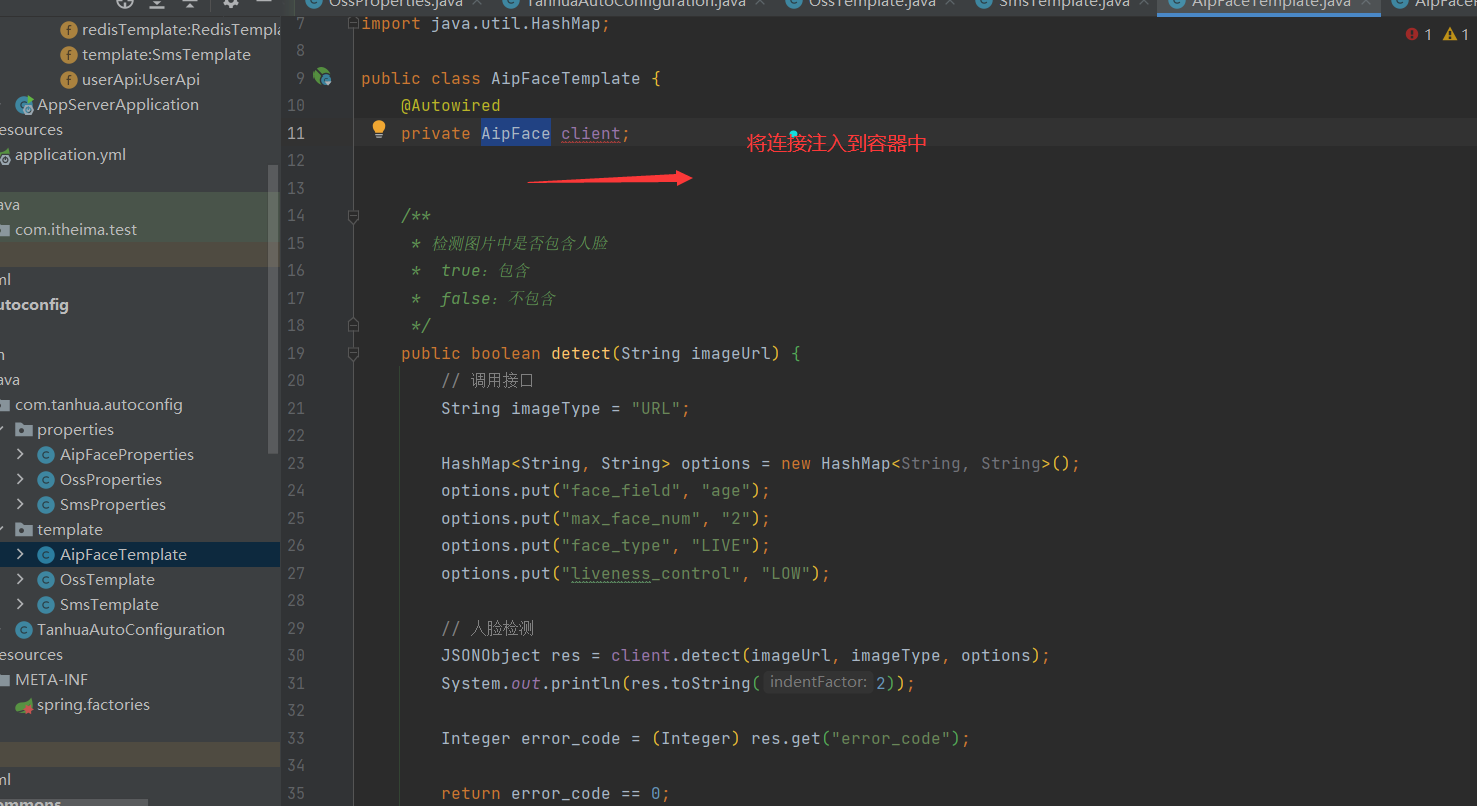
AipFaceTemplate
1
2
3
4
5
6
7
8
9
10
11
12
13
14
15
16
17
18
19
20
21
22
23
24
25
26
27
28
29
30
31
32
33
34
35
36
37
38
| package com.tanhua.autoconfig.template;
import com.baidu.aip.face.AipFace;
import org.json.JSONObject;
import org.springframework.beans.factory.annotation.Autowired;
import java.util.HashMap;
public class AipFaceTemplate {
@Autowired
private AipFace client;
public boolean detect(String imageUrl) {
String imageType = "URL";
HashMap<String, String> options = new HashMap<String, String>();
options.put("face_field", "age");
options.put("max_face_num", "2");
options.put("face_type", "LIVE");
options.put("liveness_control", "LOW");
JSONObject res = client.detect(imageUrl, imageType, options);
System.out.println(res.toString(2));
Integer error_code = (Integer) res.get("error_code");
return error_code == 0;
}
}
|
1
2
3
4
5
|
aip:
appId: 26425023
apiKey: RnLai3853A5SQopsWfU2hUP9
secretKey: vQCluUNOTPRM5wqG8llOYFqYVAGDG1v5
|

测试类:
1
2
3
4
5
6
7
8
9
10
11
12
13
14
15
16
17
18
19
20
21
22
23
24
25
| package com.itheima.test;
import com.tanhua.autoconfig.template.AipFaceTemplate;
import com.tanhua.server.AppServerApplication;
import org.junit.Test;
import org.junit.runner.RunWith;
import org.springframework.beans.factory.annotation.Autowired;
import org.springframework.boot.test.context.SpringBootTest;
import org.springframework.test.context.junit4.SpringRunner;
@RunWith(SpringRunner.class)
@SpringBootTest(classes = AppServerApplication.class)
public class FaceTest {
@Autowired
private AipFaceTemplate template;
@Test
public void detectFace() {
String image = "https://kim-little.oss-cn-hangzhou.aliyuncs.com/2022/07/08/66dd861e-64f7-40d4-b351-3cfcbffd9685.png";
boolean detect = template.detect(image);
System.out.println(detect);
}
}
|
全局异常优化:
没有优化之前:controller需要进行异常抛出
1
2
3
4
5
6
7
8
9
10
11
12
13
14
15
16
17
18
19
20
21
22
23
|
@PostMapping("/loginVerification")
public ResponseEntity loginVerification(@RequestBody Map map) {
try {
String phone = (String) map.get("phone");
String code = (String) map.get("verificationCode");
Map retMap = userService.loginVerification(phone,code);
return ResponseEntity.ok(retMap);
}catch (BusinessException be){
ErrorResult errorResult = be.getErrorResult();
return ResponseEntity.status(500).body(errorResult);
}catch (Exception e){
return ResponseEntity.status(500).body(ErrorResult.error());
}
}
|
使用统一异常处理:
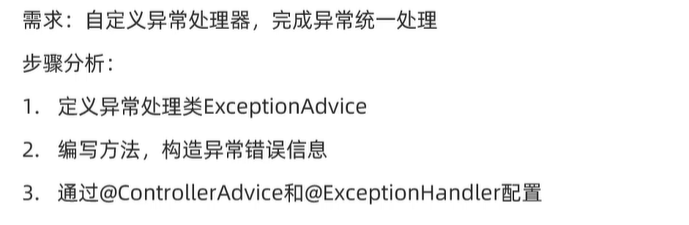
需求:自定义异常处理器,完成异常统一处理
步骤分析: